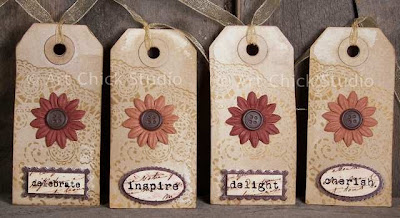
Fall Flowers Hang Tags

Since Autumn is one of my two favorite seasons of the year, the other being Spring, I always enjoy creating fall-themed art projects. And since I'm trying to create more and more sets when I create hangtags, I created this fall-themed hangtag set. I'm also entering this in the City Crafter Challenge Blog's Autumn Leaves Falling Challenge. This challenge required us to create any project using the colors of Autumn Leaves. I've definitely used some of my favorite fall colors!

Fall Flowers Altered Tags

This set of four tags all started out plain, and I used my usual grungy sauce mix to grungy them up. Then I used a doily-patterned rubber stamp to stamp on the doily texture using yellow-gold ink. Next I picked out fabric  sunflower-type flowers in 2 shades of orange and I attached one to each hangtag using a brown metal button fastener. Then I chose four dimensional stickers, each with its own word, and adhered one to the bottom of each hangtag. All that was left after that was to finish each of the hangtags off with a gold organdy ribbon.

I love the colors of Autumn, don't you?!

If you'd like to see more creative projects from other crafters and artists, be sure to take a peek at Today's Creative Blog. Lots of great stuff there!


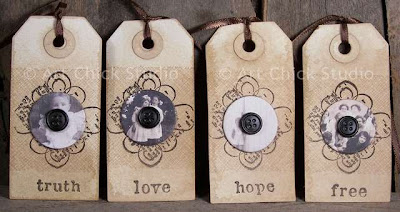
Vintage Photo Button Hang Tags

I've created some different altered hang tags recently...trying to get away from doing only individual hang tags all the time. This set is one I've done using some chipboard vintage photo buttons.

Vintage Photo Button Altered Tags


I started with four plain hang tags and used my usual secret grungy sauce mix to grungy them up. Then I took a rubber stamp that has a sort of textile/fabric texture to it and stamped each tag near the center using brown ink, just to contrast a bit with the grungy background. Then I took another decorative rubber stamp and used black ink to create a decorative ground for the buttons. Next I took four different chipboard buttons, all feature vintage photos of children, and added them using a black metal button fastener, for just an added pop of color. I finished each hang tag off by rubber stamping on a different word to each tag, and adding a brown satin ribbon to each as well.

Time Flies Hang Tags

Every year when the time change is just around the corner, it reminds me how quickly time flies. And, call me crazy, but I think time flies faster and faster the older I get! But hey, what's a gal to do? Well this crafty gal decided to create some hangtags with the Time Flies theme, and I'm using these for the City Crafters Blog Take Flight Challenge for this week...

Time Flies Altered Tags


I took some plain white tags and first used a rubber stamp with a crackle effect to stamp the background and give it some texture. Then I distressed the edges with some brown Distress Ink...I always love the distressed look on tags! Then I just took some rubber stamps that have a Time Flies theme to it and stamped the center of the tag. All that was left after that was a nice black ribbon to finish off the tag.

They're simple but elegant hang tags, and sometimes that's all they need to be. :)

Witchy Woman Canvas

I'm finally getting in the Halloween spirit, where my art is concerned at least. :) I decided to jump into the Gothic Elements Challenge at Gingersnap Creations and the result was my Witchy Woman altered art canvas below.

Witchy Woman Canvas Art


I started with a plain white primed 5x7 canvas, which I then took and spritzed on a generous amount of Coffee House Glimmer Mist. I turned it around a few times to get the little puddles that had formed to run a bit, to get some contrast with the splotchy texture that the mist creates naturally. Next I tore and distressed some turquoise scrapbook paper that has a bit of a coppery pattern design on it and adhered that to the canvas. Then I took some very thin transparent white paper elements that came with some scrap pack I'd bought at Michael's and cut them into sort of lightening bolt shapes. I'm not sure what this paper is called, but it's so thin it's almost like tissue, and it has thicker white streaks running through it.  I used Mod Podge to adhere that in a couple of spots on the canvas, and I think it really does give it a sort of lightening bolt effect, which was perfect for this Gothic witchy theme. Next I took a vintage photo of a young lady and gave her a witch hat and an Alchemy book and Mod Podged her to the canvas as well. I used some black ink to distress the edges of the canvas a bit, and also added some bats. Surely a witch needs some bats, eh? And to finish it off I added the alpha stickers to spell out the word WITCH.

I've never really created Gothic or Halloween-themed art projects until this year. It's new for me, but I'm having fun with it. I'm hoping to create some more before this spooky season passes.