Make a Wish Jar

Lots of crafty folks are making Making a Wish Jars these days. They are a super easy glass craft to make and you can do so many things with them, in all sorts of different sizes and shapes of bottles or jars.

Make a Wish Glass Jar


This Make a Wish Jar is my first, and I kept it fairly simple. I started with a fun-shaped bottle with a cork top. I added copper foil around the neck of the bottle, because I knew I was going to solder a bit of chain to the bottle.  Once the foil was burnished on well enough, I just tack-soldered a small part of the silver chain at the back of the bottle. If you don't know how to solder, this step is totally optional. I just liked the idea of keeping the chain securely in place. Then I added a silver dragonfly charm to dangle down the front of the bottle.  And of course, it's finished off with a wish written on some parchment paper and tied with ribbon, then dropped into the bottle.

Once I finished this, I thought it looked kind of plain...like it needed a little something. So I just added in a mixture of white and light blue glitter, and that did the trick.

Make a Wish Glass Jar Glitter


Your Make a Wish Bottles or Jars would be great for kids' birthdays. When it's time to blow out their birthday cake candles, have them write their wish on some paper and stick it in the jar. Then put the jar away for safe-keeping until their next birthday. You can pull out the jar for them next year and have them read the wish to see if it came true, and then they can add a new wish for the new birthday. Just an idea. ;)

Cherish Friends Altered Art

After experimenting with some gel medium transfers using transparencies, one of the images I transferred was of three little girls. I had hoped the image would transfer in black, but it came out rather pink instead. Not sure if that's due to the ink in my inkjet printer, or due to the gel medium I used (or both). But I still liked the image and decided I'd do something with it and try to work with pink and black as the primary colors. What I came up with was this altered art piece on a scrap chipboard panel I had laying around (click on the image for a full version).  I'm calling this Cherish Friends.

Cherish Friends Altered Art

I covered the chipboard panel with a vintage-looking piece of scrapbook paper; it's mostly black and white, but there are some hints of pink and light brown in it too, so it looks a bit distressed. Then I took some Tim Holz Distress Ink and darkened the edges of the chipboard, and the edges of the scrapbook paper.

I took my transfer image and tore off at each edge, to make all the edges look distressed too (you gotta love the distressed look!).  I Mod Podged a postage sticker to the scrapbook paper, followed by my vintage photo, and burnished them well to make sure they were well adhered to the paper.

Next it was time to embellish. I added a sticker of roses that has just a hint of sparkle to it, followed by a digital photo of a butterfly (I've come to realize that I must have a thing for butterflies, because I use them a lot!). And I added the "Cherish" sticker to the top left of the panel.

Then I took my craft punch and punched four holes in the panel; one on either side of the word, "Cherish," and two rather close together on the opposite side of the panel. That is where my button would go. I added some pewter-finish round brads to the Cherish sticker, and I tied a black button onto the panel with some black ribbon, which I tied into a bow.

The finishing touch was adding another piece of the black ribbon horizontally across the bottom of the panel. Then I stamped out the letters for the word, "Friends" onto grungy cardstock. And I distressed them on each side with my Distress Ink, and adhered them to the ribbon and panel with glue dots.

Then, voila! It was finished. I had such fun making this! I think I have to dedicate this one to all of my best girlfriends.  :)

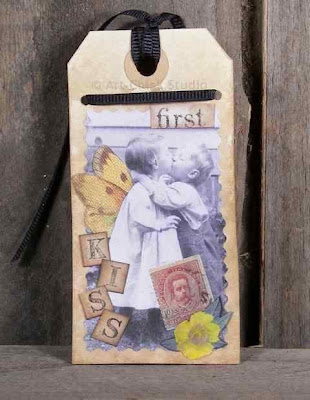
Altered Hang Tag First Kiss

So, this altered art stuff is quickly becoming my new addiction. I am so loving it! I decided I wanted to make another altered hang tag. This one is called First Kiss.

First Kiss Altered Tag


I started with a good and grungy hang tag. Then I added a vintage image of some tiny tots having their first kiss--this image was the inspiration for the whole project, of course. I just couldn't resist it! I cut a small splice in the photo behind the little girl, and I inserted some butterfly wings for a fairy nice effect. Then I Mod Podged the image to the hang tag.

Next I added two stickers, one that looks like a stamp, and the other is the yellow flower. I thought the yellow flower would help tie into the butterfly wings a bit more. Then I added the word "first" at the top of the image (that was part of a sticker too).

Next I needed to create the letters for the word "kiss." I stamped them onto grungy card stock then cut them out. Then I used Tim Holtz Distress Ink to distress the edges of each one. And then I glued each letter to the tag.

The final step was to punch two small holes near the top of the tag, so that I could add some black ribbon.  I think I need to make a bunch more hangtags...and then maybe sell them? I find it so difficult to sell artwork I created that I really like. But who knows.


She Writes Love Letters Altered Kraft Envelope

I belong to a wonderful, creative community at Ning called Scraptivate. It's for scrappers and other paper and mixed media artists.  Each month they have a creative challenge, and the challenge for March is called, "She..." We can interpret the theme in any way we want and using any media, so it really allows for a lot of creative freedom and expression. I love doing these challenges because it really helps to get my creative juices flowing! Here is my entry for the March challenge.

She Writes Love Letters Altered Art


I used a plain, Kraft paper envelope as the base, which is about 4-1/2" x 6-1/2". I used a large script rubber stamp to create the text on the envelope. Then I chose a nice vintage photo of a woman and sewed that to some muslin, which I'd distressed a bit. I added just a little color to the woman's cheeks.  The flowers are 3-D scrapping stickers. The postage stamps and the long "love" clipping at the top are also stickers. I added some grungy'd up cardstock to the left and right of the image, and I stamped one side with the word, "Letters." And in the lower left there is a 3-D paper image of some letters.

I really like the texture, depth and layers of this altered art piece.  And I loved using the Kraft envelope as the basis for the piece, as it's something I had not used before. And I love the woman in the photo--she has a dreamy sort of quality about her, sort of like she's thinking about whomever she is writing those love letters to.

Altered Fruit Cups

I was eating a fruit cup of peaches the other night ("lite" peaches, of course, who needs those extra calories?!) and I decided that the tin cup the fruit comes in would be a great base for an altered art project.  So I was out in the studio today and decided to create a mini-tutorial for my project to share with you. I didn't get quite as many photos as I'd planned...darn camera was acting up for some reason in the middle of the project. But I think you'll get the idea anyway, and I hope you'll enjoy this tutorial.

Supplies Needed

Washed and Dried Tin Fruit Cup

Ric Rac, Ribbon or Other Similar Sewing Finishes

Scrapbook Paper or Other Decorative Paper

Some Ephemera for Embellishment

Mod Podge and Hot Glue Gun

Paint Brush

Pliers

Scissors


Tin Fruit Cups


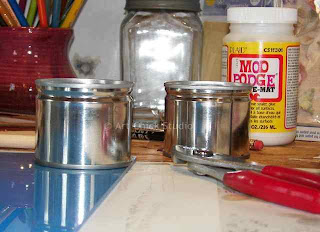
Step 1: The first step is to crimp the inside edge of the fruit cup, because it's sharp. You don't want to cut your fingers on it, so just use a pair of pliers to crimp and flatten that sharp edge on the upper part of the inside of the tin.

Tin Fruit Cups Pliers


Step 2: Cut your decorative paper into a strip that will fit around the outside of your fruit cup tin. Mine turned out to be 1-1/2" high by about 8" long (note: I didn't need the full length--I just gave myself a little extra to be sure it would fit). Mod Podge the surface of the tin and adhere your paper to it.

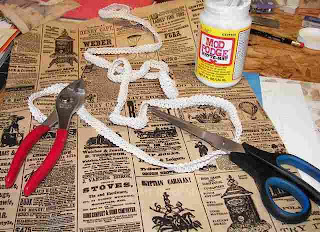
Tin Fruit Cups Supplies


Step 3: Gather your ribbon embellishments and embellish your tin as desired. You can add ribbon or ric rac to the top of the tin, or to both the top and bottom. I used hot glue to adhere the ribbon to my tins, just adding a few small dots of glue here and there to secure it.

Step 4: You can add any kind of ephemera to the front center of the can for a more decorative touch to finish off your altered fruit cup. I used a 3-D sticker on one tin, and a button on the other.

Altered Fruit Cup Candle Holder

Fruit Cup Candle Holder Altered Art


I added a glass votive cup to this tin and then put a votive candle inside. You could also place a small terra cotta pot inside and add some silk flowers or drieds. I used ribbon at the top and bottom of the tin and a 3-D butterfly sticker on the front.

Altered Fruit Cup Glue Caddy

Fruit Cup Glue Caddy Altered Art


The fruit cup tin is the perfect size to hold any objects that aren't too tall. I decided to use this one to hold a supply of glue sticks. I only used some decorative sewing trim at the top of this tin, and then added a black button to the front to finish it off.

If you try this project, come back and leave a comment and let me know. Would love to see what you did with your fruit cup!

Primitive Sheep Penny Rug

This is my first ever primitive penny rug! I wasn't sure it was going to be a penny rug initially. I made the sheep first (made  two of them actually).  And I just kept them for the longest time, not sure what to do with them. But I finally decided I'd use one as an experiment in penny rugs.

Primitive Sheep Penny Rug Felt Craft

It's all made from felt, some of it wool felt and some just regular felt from the fabric store. I used felt buttons on the side to be the "pennies." I just saw them at the craft store and thought they were neat. The button on top of the heart is a real button though.

It's not perfect...I can see the flaws (don't you hate how when you make something yourself you see your mistakes first!). But overall, I'm happy with it. I still have one sheep left too, so I may either make another penny rug, or something else all together!