Fly ATC

This is my very first ever ATC (Artist Trading Card). Not sure if I followed all the rules--not that there are any ATC police to come and get me if I didn't. LOL The main requirement of an ATC is in its size; it's basically a miniature work of art and should be 2-1/2 x 3-1/2" in size. ATC's are meant to be swapped or traded, but never sold.  I really need to get making a bunch of these, so I can start doing some ATC swapping. How fun would that be? To have a grand collection of mini works of art, created not just by you, but by people from all over the world?!

My first one was created for a challenge in a Ning Community I belong to, called Scraptivate. The challenge was to create something with the theme, Taking Flight. What we created was up to us, and medium or art form. So I just decided on an ATC.

I used some scrapbooking paper to cover some illustration board. Then I found a vintage photo of an angel that I liked, which seemed like a perfect fit to the theme for the challenge. I tore the edges of the photo and Mod Podge'd it to a grungy'd up piece of card stock I had. I wanted some color, so I found a butterfly photo to add (Butterflies do fly, after all). I added a strip of grungy, ripped muslin to the bottom for texture, and added two buttons to create some depth. I added some glitter to her wing, though it's difficult to see that in the photo. The final touch was adding the word, Fly, which I stamped onto grungy paper.


Fly Altered Art ATC


One of these days, who knows, she might belong to someone on the other side of the world! Fly, indeed.

Friends Altered Hang Tag

I was working in my studio today and decided to create another altered art hang tag.  I'm calling this one, Friends. I found a cute vintage photo of some young girls that I thought was perfect. I added a stamp of script text over the bottom half of the photo and tag. Then I added the yellow butterfly for a bright pop of color. And I finished it off with the "FRIENDS" sticker at the top, and the PLAY letters at the bottom. I'm really just getting warmed up on altered art...can't wait to see what I produce once I get good at it. :o) I do like how this turned out though. Wouldn't it be great as a gift tag for a gift to a girlfriend?

Friends Altered Art Tag


Beauty Altered Art Hang Tag

Adding to my Altered Art adventure today, I created this Altered Hang tag I'm calling Beauty. The hang tag itself has been grungy'd up with my favorite grungy sauce, and baked dry. I added some satin ribbon in a deep, rich burgundy color. I decoupaged on some paper flower elements. I also stamped and partially embossed a dragonfly, and stamped on the word, "beauty." The final touch was a sticker at the bottom that reads, "discover."

Beauty Altered Art Hang Tag

Believe Altered Notecard

I was in total Altered Art mode in the studio today. I came up with two new creations that I am very pleased with, and this is one of them. It's an Altered Notecard called, Believe. I used a brown kraft cardstock notecard blank to start with. I added a text stamp in the background to give it some texture. Then I used an ornamental stamp in a couple of places and embossed those to create some relief. The fairy girl was created from a vintage photo, along with some fabric scraps for her wings. Then I topped it off with a "Believe" sticker, and did some distressing of the edges using ink, to give it a more aged look. Oh, and I thought an envelope would be good, so I added the word, "Believe" to that and embossed it as well.

Believe Altered Art Notecard

Valentine Birthday Canvas

My sister's birthday is on Valentine's Day, and I decided to make her a special gift this year. Since I am just starting to get into Altered Art, I thought this would be the perfect type of gift to make for her. So she's getting not only a very special birthday valentine, but also my very first official altered art project.

Step One: The Background

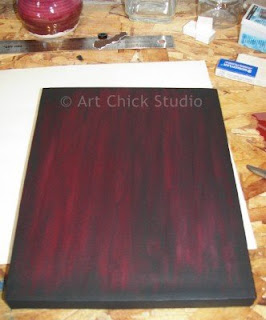
I used Golden Fluid Acrylics in a very nice deep red and black to paint the background, and I did just black on the sides of my 8x10 canvas.

Valentine Canvas Background


Step Two: Layered Fabric Heart

I created a heart (it is for Valentine's Day, after all) out of three layers of fabric, including red felt for the biggest heart, grungy muslin for the middle, and a black cotton print for the top. I sewed them all together and then added a transparency image of my sister and I from when we were little.

Valentine Birthday Canvas Heart


Step Three: A Grungy Hang Tag

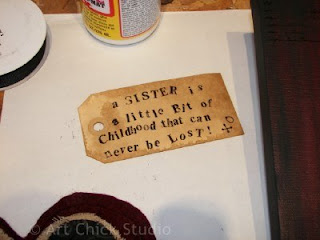
I created a grungy hang tag with a sentiment I found online, which seemed just perfect for my project.

Valentine Birthday Canvas Hang Tag


Step 4: Embellishments

I added several embellishments: torn paper, some buttons, a key with a heart shape in it etc, and I stamped some text onto the upper part of the canvas for some texture.

Valentine Birthday Canvas Embellishments


Step Five: Some Finishing Touches

To finish it off, I added some stickers, stamped some dragonflies, and stitched the fabric heart directly to the canvas in a few spots, just to make sure it was secure.

Valentine Birthday Canvas


And tomorrow, this first altered art project and gift will be on its way to my sister in Texas.  Hope she likes it!